Look down at your lawn right now. Those brown patches, the compacted soil, the matted dead grass—that’s winter’s calling card, and you’re not alone in feeling frustrated by it.
**Spring lawn renovation isn’t just about cosmetic fixes.** It’s your opportunity to rebuild your lawn’s foundation, creating a dense, resilient turf that naturally crowds out weeds and withstands summer stress. The difference between a struggling lawn and a thriving one often comes down to these critical weeks between the last frost and peak growing season.
The good news? You don’t need expensive lawn services or complicated chemistry to transform your yard. What you need is a strategic approach that works *with* your grass’s natural growth cycle, addressing the specific damage winter inflicted on your soil structure, root systems, and turf density.
**This guide walks you through the complete renovation process**—from assessing winter damage and timing your interventions correctly, to choosing between overseeding and more aggressive renovation techniques. You’ll learn sustainable practices that build long-term lawn health rather than creating dependency on chemical inputs. We’ll cover the essential equipment that makes renovation manageable (without breaking your budget) and the post-renovation care that ensures your efforts actually pay off.
Whether you’re dealing with minor thin spots or contemplating a near-complete lawn overhaul, the next 2,400 words will give you a clear roadmap. Your lawn’s best season starts now.
Understanding What Winter Did to Your Lawn
Common Winter Damage Signs
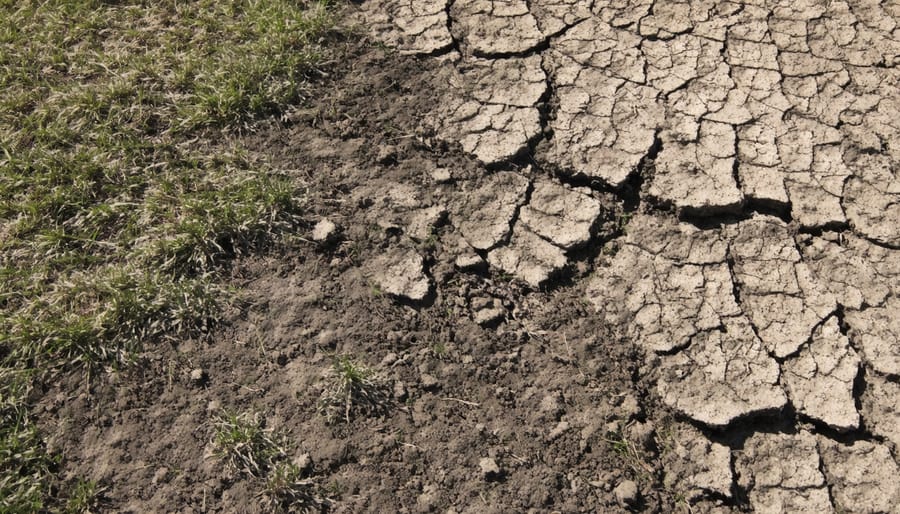
After months of snow, ice, and freezing temperatures, your lawn might look like it’s been through battle—and honestly, it has! Understanding what winter damage looks like is your first step toward successful spring renovation. Let’s walk through the telltale signs that your turf needs some extra attention.
**Brown patches** are perhaps the most obvious indicator. These aren’t the uniform dormancy you might see across your entire lawn, but rather distinct dead areas where grass simply didn’t survive. Snow mold often creates circular brown or grayish patches that feel matted down when you touch them.
**Thinning grass** reveals more soil than you remember seeing last fall. If you can easily see the ground between grass blades, winter stress has taken its toll. This often happens in high-traffic areas or spots where snow was piled repeatedly during shoveling.
**Moss growth** signals compacted, poorly draining soil—a common result of winter’s freeze-thaw cycles. While moss looks green, it’s actually crowding out your grass and indicates underlying soil health issues that need addressing.
**Bare spots** are self-explanatory but frustrating. These completely grassless areas often appear where ice accumulated, salt was applied, or snow sat longest. They’re prime real estate for weeds if you don’t act quickly.
If you notice these signs, don’t panic! Proper winter lawn preparation helps prevent damage, but even well-maintained lawns experience some winter casualties. The good news? Spring renovation techniques can bring your lawn back beautifully.
Why Early Spring Action Matters
Timing isn’t just a convenience issue when it comes to lawn renovation—it’s rooted in the fundamental biology of how grass grows. Understanding why early spring offers such a narrow but powerful window can mean the difference between a thriving lawn and months of frustration.
Cool-season grasses like Kentucky bluegrass, perennial ryegrass, and tall fescue naturally wake up from winter dormancy when soil temperatures consistently reach 50-55°F. This typically happens in early spring, triggering what’s called the “spring green-up.” During this period, grass plants shift energy toward aggressive root development and blade growth—exactly what you want when establishing new seed or repairing damaged areas.
Think of it this way: your grass is biologically programmed to grow vigorously in spring. By renovating during this natural growth surge, you’re working *with* your lawn rather than against it. Seeds germinate faster, roots establish more deeply, and new grass integrates seamlessly with existing turf. It’s like catching a wave—the momentum is already there.
The soil temperature threshold matters for another crucial reason: weed competition. Many common lawn weeds, particularly crabgrass, don’t germinate until soil temperatures reach the mid-60s. This gives you a strategic advantage. Renovate early enough, and your desirable grass gets a head start, establishing itself before weeds can muscle in. Miss this window, and you’ll spend the summer battling unwanted plants instead of enjoying your revitalized lawn.
Early action also allows your newly renovated lawn to build strength before summer’s heat and drought stress arrive, creating a more resilient, sustainable turf that requires less water and fewer inputs long-term.
The Spring Lawn Renovation Timeline
Early Spring Tasks (When Soil Temperature Reaches 50°F)
Before diving into heavier renovation work, your lawn needs a gentle wake-up call. Think of early spring as your lawn’s stretching period after a long winter nap—rushing in too aggressively can do more harm than good.
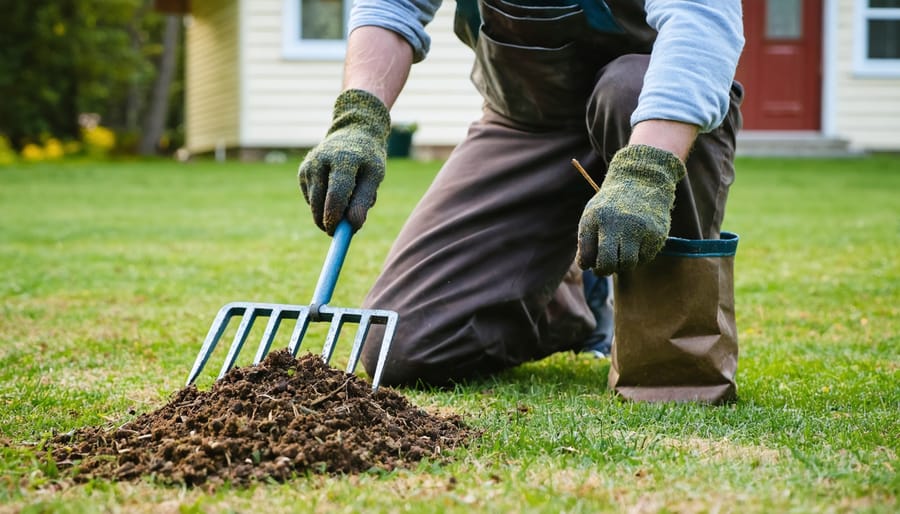
Start by walking your property with a rake in hand, removing any debris that accumulated over winter: fallen branches, leaves, and those mysterious objects that somehow appeared during the thaw. This simple cleanup allows sunlight to reach the grass crowns and improves air circulation, both essential for encouraging new growth.
Check your soil temperature with an inexpensive soil thermometer—when it consistently reaches 50°F, your grass is ready to grow. This typically happens when you notice forsythia blooming or dandelions appearing.
For your first mowing, set your blade higher than usual, removing only the top third of the grass height. This prevents stress on emerging growth while still tidying up brown tips. Make sure your mower blade is sharp; a clean cut heals faster and reduces disease vulnerability—a sustainable practice that costs nothing but pays dividends all season.
Resist the urge to fertilize just yet. Your lawn is still waking up, and premature feeding can promote excessive top growth at the expense of root development. Patience now sets the foundation for successful renovation ahead.
Mid-Spring Intensive Renovation
Mid to late spring—typically when soil temperatures consistently reach 50-60°F—is your prime renovation window. This is when your cool-season grass is in peak growth mode, ready to respond beautifully to your efforts.
Start with **aeration** if your lawn feels spongy or water pools after rain. Core aeration removes plugs of soil, allowing oxygen, nutrients, and water to penetrate compacted earth. For most lawns, aerating once annually during this period is sufficient. Don’t rake up those soil plugs—they’ll break down naturally and actually help improve your soil structure.
Next comes **dethatching** if your thatch layer exceeds half an inch. Use a dethatching rake for small areas or rent a power dethatcher for larger spaces. This removes the dense mat of dead grass and organic debris that suffocates your lawn. It looks brutal while you’re doing it, but your grass will thank you.
Within 48 hours of dethatching, **overseed** bare or thin areas. Choose quality seed suited to your region and light conditions. Spread seed generously—good seed-to-soil contact is crucial. I like to go over the area lightly with a rake to nestle seeds into the soil.
Finally, apply a **slow-release organic fertilizer**. Unlike synthetic quick-fixes, organic options feed your soil’s microbiome while nourishing grass, creating sustainable, long-term health. Water thoroughly after application, keeping the top inch of soil consistently moist for 2-3 weeks while seeds germinate.
Essential Spring Lawn Renovation Techniques
Dethatching: Removing the Suffocating Layer
That brown, spongy layer between your grass blades and the soil? That’s thatch—a buildup of dead grass stems, roots, and organic debris. While a thin layer (about half an inch) actually benefits your lawn by regulating soil temperature and retaining moisture, anything thicker becomes a serious problem. Excessive thatch prevents water, nutrients, and air from reaching the soil, essentially suffocating your grass roots and creating the perfect environment for pests and diseases.
You’ll know dethatching is necessary if your lawn feels springy underfoot or if you can easily pull up a thick mat of brown material. Spring is the ideal time for this task, giving your grass the entire growing season to recover.
For smaller lawns, a manual dethatching rake works wonderfully—it’s affordable, quiet, and gives you a solid workout. Simply rake vigorously to pull up the thatch layer. For larger areas or severe thatch problems, a power dethatcher (also called a vertical mower) makes the job much easier. These machines use vertical blades to slice through thatch and bring it to the surface.
Here’s a sustainable tip I always share: don’t bag up that removed thatch and send it to the landfill! If it’s disease-free, add it to your compost pile where it’ll break down into nutrient-rich amendment for your garden beds. You can also use it as mulch around trees and shrubs, creating a full-circle approach to lawn care that nourishes your entire landscape while reducing waste.

Aeration: Getting Oxygen to Grassroots
If your lawn feels more like walking on concrete than a soft carpet of grass, you’re dealing with soil compaction—one of the most common yet overlooked obstacles to a healthy lawn. Think of compaction as your soil gasping for air. Over time, foot traffic, heavy equipment, and even winter’s freeze-thaw cycles squeeze soil particles together, eliminating the tiny air pockets that roots desperately need. Without oxygen reaching the root zone, even the most determined grass struggles to absorb nutrients and water, leading to that thin, lackluster appearance.
Core aeration is your solution—a process that removes small plugs of soil from your lawn, creating channels for oxygen, water, and nutrients to penetrate deep into the root zone. Those little soil plugs dotting your lawn after aeration might look messy for a week or two, but they’re actually breaking down to enrich your soil while those holes work their magic below the surface.
Timing matters significantly. For cool-season grasses, aim for early to mid-spring when soil moisture is adequate but not waterlogged. You want the ground firm enough that the aerator’s tines can penetrate effectively—usually when you can push a screwdriver six inches into the soil with moderate effort.
For smaller lawns under 2,000 square feet, manual aerators with foot bars provide an affordable, eco-friendly option and a decent workout. However, most homeowners benefit from powered aerators, available as walk-behind models you can rent from equipment centers for around $75-100 per day. Gas-powered aerators make quick work of larger areas, though electric models offer quieter, emission-free operation for environmentally conscious gardeners.
The investment pays immediate dividends: improved drainage, enhanced fertilizer effectiveness, and stronger root development that helps your lawn withstand summer stress and resist disease naturally.

Overseeding for Thick, Resilient Growth
Overseeding breathes new life into thinning lawns, filling in bare patches and creating that lush, carpet-like appearance we all dream about. Think of it as giving your lawn a fresh start without the expense and effort of complete renovation—you’re essentially reinforcing what’s already there.
First things first: choosing the right seed makes all the difference. For cool-season lawns in northern climates, perennial ryegrass germinates quickly and establishes beautifully, while tall fescue offers excellent drought tolerance once established. Kentucky bluegrass creates that classic, dense turf but requires more patience. If you’re working with a warm-season lawn in southern regions, bermudagrass and zoysia are your go-to options. I always recommend selecting a seed blend rather than a single variety—it’s nature’s insurance policy against disease and stress.
Timing matters tremendously here, and understanding proper seeding timing prevents costly mistakes. For cool-season grasses, early fall is actually ideal, though early spring works if you’ve missed that window. Warm-season varieties thrive when seeded in late spring through early summer.
Before spreading seed, mow your existing lawn shorter than usual—about 1.5 inches—and rake vigorously to expose soil. This crucial step ensures seed-to-soil contact. Apply seed at the recommended rate (typically 5-8 pounds per 1,000 square feet for overseeding), using a broadcast spreader for even coverage. Don’t get overly generous; too much seed creates competition and weak growth.
Here’s where many folks stumble: moisture management. Seeds need consistent moisture to germinate—we’re talking light watering two to three times daily for the first two weeks. Yes, it’s commitment! But once you see those tiny grass blades emerging, you’ll understand why. Gradually reduce frequency while increasing duration as seedlings mature, encouraging deeper root development for long-term resilience.
Strategic Spring Fertilization
After you’ve assessed your lawn’s condition and tackled any necessary repairs, it’s time to give your grass the nutritional boost it needs to thrive. Think of fertilization as preparing a nourishing meal for your lawn after its winter hibernation—getting the recipe right makes all the difference!
For spring applications, look for fertilizers with a balanced NPK ratio that emphasizes nitrogen, such as 20-5-10 or 24-4-8. That first number (nitrogen) promotes the lush, green growth your lawn craves as temperatures warm up, while phosphorus and potassium support root development and overall resilience. Understanding spring fertilization timing ensures you’re feeding your lawn when it can actually use those nutrients most effectively.
You’ll encounter two main options: slow-release and quick-release fertilizers. Slow-release formulas feed your lawn gradually over 6-8 weeks, reducing the risk of burning and minimizing nutrient runoff into waterways—a win for both your lawn and the environment. Quick-release options provide an immediate green-up but require more frequent applications and careful watering to prevent damage.
For eco-conscious gardeners, organic alternatives like compost, corn gluten meal, or alfalfa-based fertilizers offer excellent results while building soil health. They release nutrients more slowly and improve your soil’s structure over time, though they typically cost more upfront.
Whatever you choose, apply responsibly: use a calibrated spreader, avoid fertilizing before heavy rain, keep products off hardscapes, and never exceed recommended rates. More isn’t better—it’s wasteful and harmful to local ecosystems.
Addressing Specific Problem Areas
Repairing Bare Patches and Dead Spots
Bare patches are like blank canvases waiting for your attention, and spring is the perfect time to fill them in. Start by roughing up the soil surface with a garden rake, breaking up any compacted areas to about a quarter-inch depth. Remove debris and add a thin layer of compost to give new grass roots the nutrients they need—this sustainable approach beats synthetic fertilizers while improving soil structure.
Choose grass seed that matches your existing lawn type and growing conditions. Sun-loving Kentucky bluegrass won’t thrive in shady spots where fine fescue excels, so take a moment to observe your problem areas throughout the day. Mix your seed with a little compost in a bucket—this helps distribute it evenly and gives seeds an immediate nutrient boost.
Spread the seed mixture generously over bare spots, using about 15-20 seeds per square inch. Lightly rake it in so seeds make good soil contact, then gently tamp down with the back of your rake or your foot. The key to success is consistent moisture: water lightly twice daily for the first two weeks, keeping the top inch of soil damp but not soggy. You should see sprouts in 7-14 days.
Once new grass reaches about three inches tall, reduce watering frequency but water more deeply, encouraging strong root development that’ll help these repaired areas withstand future challenges.
Dealing with Moss and Weeds
Moss and weeds are telling you something important about your lawn’s health, and spring is the perfect time to listen and respond. Rather than reaching for harsh chemicals, let’s address the root causes—literally.
Moss thrives where grass struggles, typically indicating compacted soil, poor drainage, excessive shade, or low soil pH. Start by aerating affected areas to improve drainage and air circulation. Test your soil’s pH; if it’s below 6.0, apply lime to create conditions that favor grass over moss. For shady spots, consider pruning overhanging branches to increase sunlight, or embrace the shade by choosing shade-tolerant grass varieties for overseeding.
To remove existing moss, gently rake it out after aeration—it should lift relatively easily. The key is preventing its return by maintaining healthy, thick grass that outcompetes it naturally.
For spring weeds, timing is everything. Apply corn gluten meal, a natural pre-emergent, in early spring before weed seeds germinate. This organic byproduct prevents root formation without harming existing grass. For established weeds, hand-pulling after rain when soil is soft remains remarkably effective, especially before they flower and spread seeds.
Remember, a thick, healthy lawn is your best defense against both moss and weeds. Focus on the fundamentals—proper mowing height, adequate fertilization, and consistent watering—and you’ll naturally crowd out these unwanted guests.
Managing Compacted High-Traffic Areas
High-traffic areas like pathways, play zones, and shortcuts across your lawn face a unique challenge—relentless compaction that prevents water, air, and nutrients from reaching grass roots. Think of it as your soil getting packed down like a dirt driveway!
The solution requires more aggressive intervention than your typical lawn renovation. Start by aerating these areas multiple times in different directions, creating overlapping holes that thoroughly break up compacted soil. Core aeration works best here, removing actual plugs rather than just punching holes.
After aerating, immediately top-dress with a compost-sand mixture (about 70% compost, 30% coarse sand). This amendment improves drainage while adding organic matter that helps rebuild soil structure over time. Work it into the aeration holes using the back of a rake.
For extremely compacted areas, consider gypsum application before top-dressing. This natural mineral helps break up clay particles without changing soil pH—a sustainable alternative to harsh chemicals.
Overseed heavily in these zones, using hardy cultivars that tolerate foot traffic better. Then establish temporary pathways using stepping stones or mulched trails to redirect traffic while new grass establishes. Your lawn will thank you for this patient approach!
Tools and Equipment for Successful Renovation
Manual vs. Powered Equipment
Choosing between manual and motorized tools depends on your lawn size and physical capabilities—and there’s no shame in either choice. For lawns under 1,000 square feet, hand tools like manual aerators and dethatching rakes are perfectly viable options. They’re budget-friendly, require no fuel or electricity, and give you a fantastic workout. Plus, they’re quieter and completely emission-free, which aligns beautifully with sustainable gardening practices.
However, let’s be honest: manually aerating a 5,000-square-foot lawn is backbreaking work that could take days. For medium to large lawns, powered equipment becomes a practical necessity rather than a luxury. Gas or electric dethatchers, aerators, and overseeders dramatically reduce labor time and physical strain. Modern electric models offer impressive power with lower environmental impact than their gas counterparts.
Here’s a practical approach: rent powered equipment for your spring renovation, especially if you’re tackling aeration or dethatching. This lets you complete heavy-duty tasks efficiently without the storage and maintenance commitment. For routine maintenance throughout the season, hand tools work wonderfully. Before investing in any equipment, check out our guide on lawn care equipment setup to maximize your investment and ensure proper operation from day one.
Essential Tool Checklist
Before diving into your spring lawn makeover, let’s talk tools. Having the right equipment makes renovation work easier and more effective—plus, investing in quality, sustainable options means you’ll use them for years to come.
Start with a **reliable lawn rake** for removing thatch and debris. Look for models with replaceable heads to reduce waste. For bigger lawns, consider a dethatching rake or rent a power dethatcher—just one weekend rental can transform a week-long project into an afternoon task.
A **core aerator** is essential for compacted soil. Manual aerators work beautifully for smaller spaces and provide great exercise, while gas or electric powered versions tackle larger areas efficiently. Many garden centers offer seasonal rentals, which is perfect if you’re testing the waters before committing to purchase.
Don’t overlook a **quality broadcast spreader** for seed and fertilizer application. We’ve found that rotary spreaders provide more even coverage than drop spreaders, especially for beginners. Choose models with adjustable settings and rust-resistant construction.
For sustainable practices, invest in a **soil testing kit** to avoid over-fertilizing, and keep a **rain gauge** handy to prevent overwatering. A **push reel mower** is wonderfully eco-friendly if you’re maintaining a smaller lawn post-renovation—quiet, zero emissions, and surprisingly effective with sharp blades.
Post-Renovation Care for Maximum Growth
Watering Strategies for New Growth
Water is the lifeblood of successful spring lawn renovation, but here’s where many well-intentioned gardeners go astray—not all grass needs the same watering approach. Your newly seeded areas demand completely different treatment than your established turf.
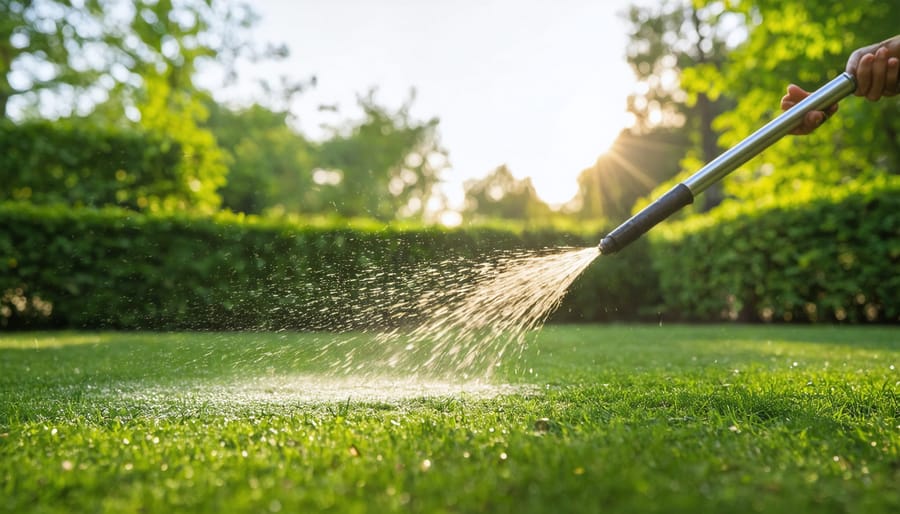
For freshly seeded patches, think “little and often.” Keep the top inch of soil consistently moist—not waterlogged—with light, frequent watering. This typically means watering two to three times daily for just 5-10 minutes until seeds germinate. I know it sounds demanding, but those first 7-14 days are critical. Once seedlings reach about an inch tall, gradually transition to deeper, less frequent watering.
Established grass, on the other hand, thrives with the opposite approach: deep, infrequent soaking. Aim for one inch of water per week, applied in one or two sessions. This encourages roots to grow deeper, creating a more drought-resistant lawn—a sustainability win!
Here’s a water-saving tip that works beautifully: water in the early morning (between 4-10 AM) when evaporation is minimal and wind is calm. You’ll use 25-30% less water than midday watering while achieving better results.
To check if you’re watering deeply enough, push a screwdriver into the soil—it should penetrate 6 inches easily. This simple test prevents both overwatering and underwatering, conserving this precious resource while nurturing your renovated lawn to perfection.
Spring Mowing Best Practices
After all your hard work renovating your lawn, don’t let improper mowing undo your progress! Spring mowing requires a gentler approach than summer maintenance, as your grass is still building strength after winter dormancy.
The golden rule for spring mowing is the **one-third principle**—never remove more than one-third of the grass blade height in a single mowing. Cutting too short stresses your recovering lawn, forcing it to divert energy from root development to blade regrowth. This weakens the entire plant and creates opportunities for weeds to establish themselves in bare spots.
Start with a higher mowing height in early spring, around 3 to 3.5 inches for most cool-season grasses. This encourages deeper root growth and helps shade out emerging weed seedlings naturally. As temperatures warm and your lawn establishes vigorous growth, you can gradually lower the height to your preferred summer setting.
**Blade sharpness is non-negotiable** during spring renovation. Dull mower blades tear grass instead of cutting cleanly, creating ragged brown edges that invite disease and moisture loss. Sharpen your blades before the season begins, then check them every 8-10 hours of mowing time. A clean cut heals quickly and keeps your lawn looking crisp and healthy.
As for grass clippings, leave them on the lawn! This sustainable practice, called grasscycling, returns valuable nitrogen and moisture to the soil—reducing your fertilizer needs by up to 25%. The clippings decompose within days, feeding your recovering lawn naturally without contributing to thatch buildup, contrary to popular myth.
Transforming your lawn this spring might seem like a daunting undertaking, but remember—even the most stunning landscapes started with a single step. If you’re feeling overwhelmed by everything we’ve covered, there’s absolutely no shame in starting small. Choose just one or two techniques that address your lawn’s most pressing issues, whether that’s overseeding those bare patches or finally getting your soil pH balanced. The beauty of sustainable lawn care is that it’s cumulative; each improvement you make this season creates a stronger foundation for the next.
The truth is, there’s no magic overnight solution for lawn renovation, and that’s actually good news. By taking a methodical, season-by-season approach, you’re building a resilient lawn that can withstand environmental stresses naturally, reducing your reliance on chemical interventions down the road. The work you put in now—aerating compacted soil, introducing beneficial microorganisms, establishing deep-rooted grass varieties—pays dividends year after year. Your lawn becomes easier to maintain, not harder.
As you move forward with your summer lawn maintenance, you’ll start noticing the results of your spring efforts: grass that stays greener during dry spells, fewer weeds competing for space, and a lush carpet that feels incredible underfoot. That first backyard barbecue where guests compliment your lawn? That’s when you’ll know your hard work was worth it. So grab your rake, test that soil, and get started—your best lawn is waiting just beneath the surface.