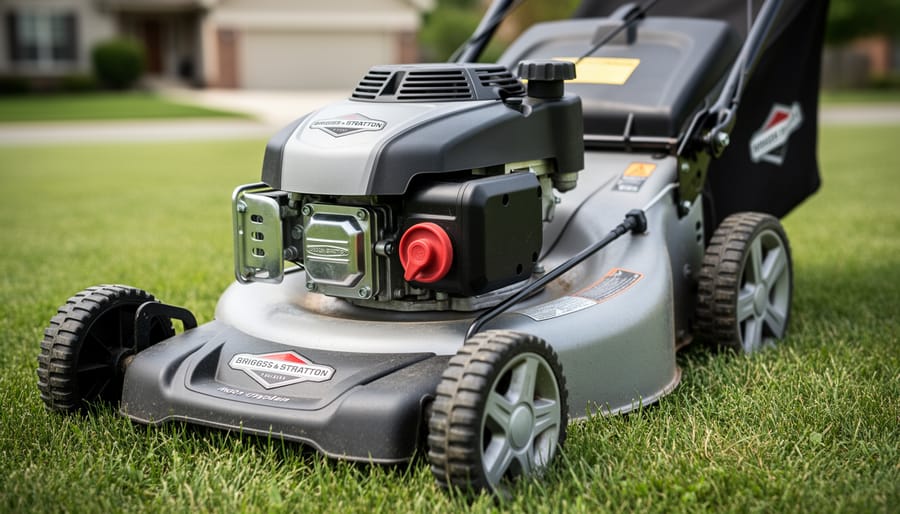
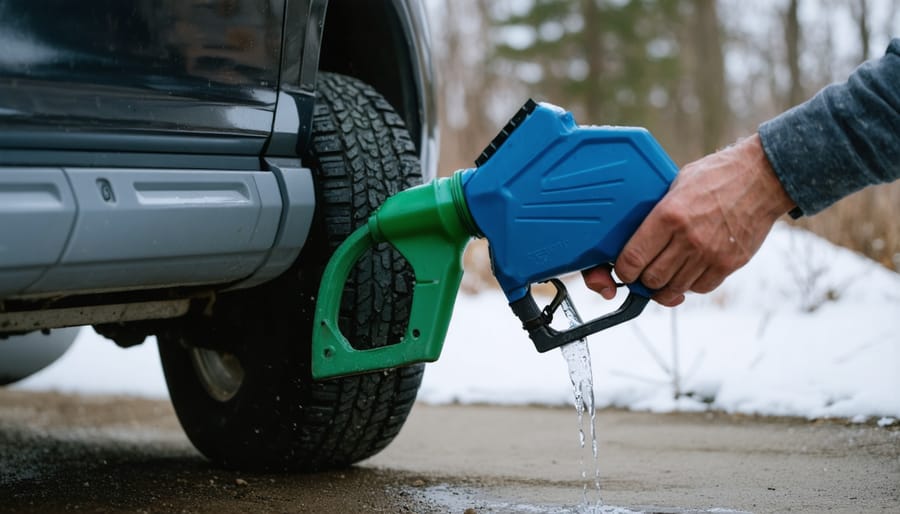
Check the fuel first—old gas from last season has likely degraded and lost combustibility, making it the number one culprit when your lawn mower won’t start after months of storage. Drain any remaining fuel and replace it with fresh gasoline mixed with stabilizer.
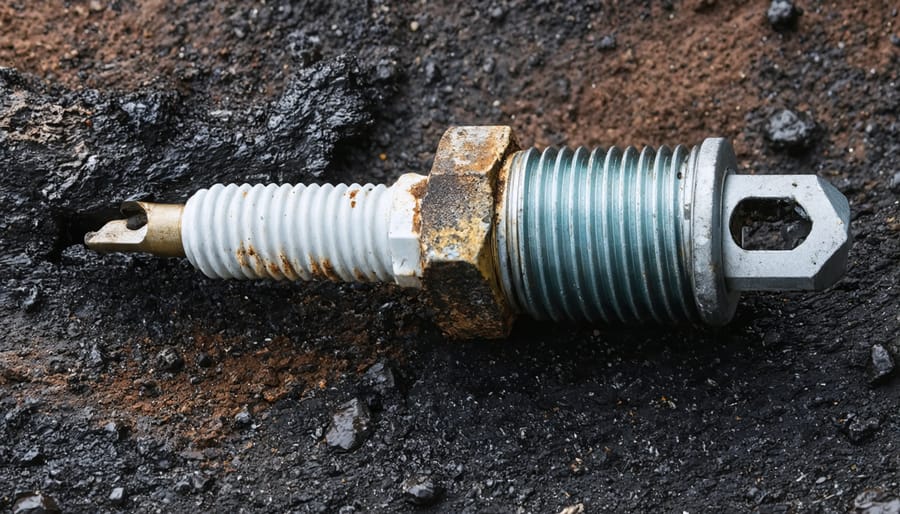
Inspect the spark plug by removing it and looking for corrosion, carbon buildup, or a worn electrode—winter moisture often damages this critical component. Clean it with a wire brush or replace it entirely (they’re inexpensive and take minutes to swap).
Prime the carburetor by pressing the primer bulb 3-5 times if your mower has one, as fuel lines often dry out during winter and need repriming to restore flow.
Clean or replace the air filter, which commonly becomes clogged with debris or moisture during storage, restricting airflow needed for combustion.
This frustrating springtime scenario happens to nearly every lawn owner eventually, but the good news is that most post-winter starting problems stem from preventable issues rather than serious mechanical failures. Understanding why your mower rebels after its winter nap—and knowing the simple fixes—will have you back to mowing within an hour in most cases. The solutions follow a logical sequence from quickest wins to slightly more involved repairs, and you’ll likely solve your problem before reaching the complex stuff. Even if you’ve never opened your mower’s hood before, these beginner-friendly steps will build your confidence while saving money on repair visits, and they’ll help you implement better winterization practices for seasons ahead.
Why Winter Storage Turns Mowers Into Stubborn Metal Blocks
I know the frustration—you wheel your trusty mower out of the garage on that first warm day, pull the starter cord with confidence, and… nothing. Just a stubborn metal block that refuses to cooperate. What happened during those quiet winter months?
Think of your mower’s hibernation like leaving a glass of soda open for several months. That gasoline sitting in your tank and carburetor has been slowly transforming into something resembling varnish. Fuel naturally degrades over time, and ethanol-blended gas (which most of us use) is particularly problematic. It absorbs moisture from the air, separating into layers and leaving behind gummy deposits that clog fuel lines and jets. These sticky residues are often the primary culprit behind a no-start situation.
Meanwhile, moisture hasn’t just been affecting your fuel. Cold winter air holds less moisture, but temperature fluctuations create condensation inside your engine, fuel tank, and even your spark plug chamber. This moisture causes rust on cylinder walls and corrosion on electrical connections—both of which interfere with proper starting and running.
Your battery, if you have an electric-start model, has been slowly losing its charge in storage. Even disconnected batteries self-discharge, and cold temperatures accelerate this process. A depleted battery simply won’t have enough juice to turn over the engine.
Finally, rubber and plastic components—like fuel lines, gaskets, and primer bulbs—can crack or harden when exposed to temperature extremes and old fuel residues. These seemingly minor issues create air leaks that prevent proper fuel delivery.
Understanding these winter gremlins isn’t just academic—it helps you prevent the same headache next year. Proper winterization with fuel stabilizer, oil changes, and battery maintenance can save you hours of spring frustration. But for now, let’s get your mower running again.
Safety First: What to Check Before You Start Troubleshooting
Before we dive into troubleshooting your stubborn mower, let’s take a moment for some essential safety steps. Trust me, a few minutes of preparation beats a trip to the emergency room any day!
First things first: **disconnect the spark plug wire**. This simple step prevents accidental starts while you’re working—something that’s more common than you’d think. Just pull the boot off the spark plug and tuck it safely away from the plug itself.
Always work in a **well-ventilated area**, preferably outdoors. Fuel vapors and engine exhaust can build up quickly in enclosed spaces like garages, creating both health hazards and fire risks.
When handling old fuel, remember it’s both flammable and toxic. Use approved containers, avoid skin contact, and never pour it down drains or onto the ground. Most auto parts stores and recycling centers accept old gasoline—a small effort that makes a big difference for our soil and water.
Wear safety glasses when working around the engine, and keep a fire extinguisher nearby. If you’re draining fuel or changing oil, place a tarp or container underneath to catch spills and protect your lawn from contamination.
Finally, consult your owner’s manual before starting any repairs—it’s your best friend for model-specific guidance.
The Quick Wins: Start With These Simple Fixes
Check Your Fuel (It’s Usually the Culprit)
Let’s start with the most common culprit—your fuel. If your mower has been sitting idle since fall with last season’s gas still in the tank, you’ve likely discovered the problem. Gasoline begins to degrade surprisingly quickly, usually within 30 days, and after several months of winter storage, it’s essentially gone bad.
**Identifying Stale Fuel**
Old gas often looks darker or cloudy compared to fresh fuel, and it may smell sour or varnish-like rather than having that sharp gasoline odor. Sometimes you’ll notice a separated layer or visible sediment. This degraded fuel gums up your carburetor and fuel lines, preventing your engine from getting the clean fuel it needs to fire up.
**Draining Old Fuel Safely**
Never try starting your mower with old fuel—you’ll just compound the problem. Instead, locate your fuel tank (usually beneath the seat or near the engine) and use a hand siphon pump or turkey baster to remove the old gas. Work outdoors in a well-ventilated area, away from any flames or sparks. Transfer the old fuel into an approved gas can, then take it to your local hazardous waste facility or automotive store that accepts old gasoline—never pour it down drains or onto the ground.
**Refilling with Fresh Fuel**
Once you’ve drained the tank completely, add fresh gasoline appropriate for your mower type. Most modern mowers run on regular unleaded, but always check your owner’s manual first.
**Preventing Future Problems**
Here’s where sustainability meets practicality: add a fuel stabilizer before winter storage. These affordable additives keep gasoline fresh for up to 24 months, eliminating this springtime headache entirely. Even better, consider running your mower dry before storage by letting it consume all remaining fuel—this eco-friendly approach means no wasted gas and no degradation worries.

Inspect the Oil Level and Condition
Here’s something many of us overlook after a long winter: your mower’s oil. It’s surprisingly common for old, dirty oil to prevent starting, and checking takes just a minute.
First, locate your dipstick—usually near the engine base. Wipe it clean, reinsert it fully, then pull it out to check the level. The oil should sit between the minimum and maximum marks. Too little starves the engine; too much can actually flood it and prevent ignition.
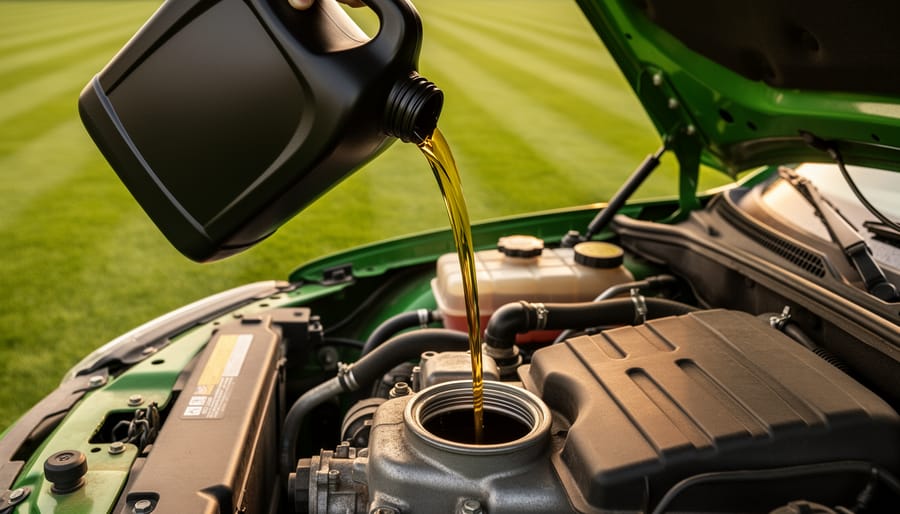
Now, look at the oil’s condition. Fresh oil is amber and translucent. If yours looks thick, black, or gritty, it’s degraded over winter and needs changing. Old oil loses its protective qualities and can gum up engine components.
Changing oil is easier than you’d think! Simply tip your mower (air filter side up—important!), drain the old oil into a container for proper recycling at your local collection center, then refill with the manufacturer’s recommended oil type. This small act of maintenance not only helps starting but extends your mower’s life significantly, reducing waste and the need for premature replacement—a win for both your wallet and the environment.
Clean or Replace the Air Filter
A clogged air filter is one of the most common culprits behind a stubborn mower that refuses to start after its winter nap. Think of your mower’s air filter as its lungs—when it’s blocked with dust, grass clippings, and debris, the engine simply can’t breathe properly. Without adequate airflow, the fuel-to-air ratio gets thrown off, making starting nearly impossible.
Locating your air filter is straightforward. Look for a plastic or metal cover on the side of your engine, usually held in place by clips, screws, or wing nuts. Once you’ve opened it up, you’ll find either a foam filter or a paper filter inside.
For foam filters, you’re in luck—these are reusable and easy to maintain. Remove the filter and inspect it closely. If it’s just dusty, wash it thoroughly with warm, soapy water, rinse well, and let it dry completely. Once dry, apply a light coating of clean engine oil, squeeze out the excess, and reinstall. This simple cleaning can make all the difference and saves you money while reducing waste—a win for both your wallet and the environment.
Paper filters, however, aren’t meant to be washed. Hold yours up to the light; if you can’t see light passing through, it’s time for a replacement. These filters are inexpensive and readily available at hardware stores. Installing a new one takes just seconds but can instantly restore your mower’s starting power.
Digging Deeper: Spark Plug and Electrical Issues
Remove and Inspect Your Spark Plug
After a long winter, your spark plug is often the culprit when your mower turns over but won’t start. The good news? Checking it is surprisingly simple, and you’ll feel like a lawn care pro doing it!
**Removing Your Spark Plug Safely**
First, disconnect the spark plug wire by pulling the rubber boot—never yank the wire itself. This prevents accidental starting while you work. Locate the spark plug (usually on top or side of the engine), and using a spark plug socket wrench, turn counterclockwise to remove it. Keep track of any washers or gaskets.
**What to Look For**
Hold your spark plug up to the light and inspect it carefully. A healthy spark plug has a light tan or gray electrode. Watch for these red flags:
– **Black, sooty deposits**: Carbon buildup from old fuel or a too-rich fuel mixture
– **White, crusty residue**: Corrosion from moisture exposure during winter storage
– **Cracked porcelain or damaged electrode**: Physical damage requiring immediate replacement
– **Wet or oily appearance**: Oil leaking into the combustion chamber
**Testing Your Spark Plug**
To test if it’s firing, reconnect the wire, hold the plug against the metal engine (use insulated pliers!), and pull the starter cord. You should see a bright blue spark. No spark or a weak orange spark means replacement time. Spark plugs are inexpensive and replacing them annually is an easy, sustainable way to keep your mower running efficiently while reducing fuel consumption.
Clean or Replace It
If your spark plug looks relatively clean with just light deposits, you can definitely save it! Use a wire brush to gently scrub away any carbon buildup, then wipe it clean with a dry cloth. However, if you notice heavy black soot, oil coating, or any cracks in the ceramic insulator, replacement is your best bet—spark plugs are inexpensive, and a fresh one often makes a noticeable difference in starting performance.
When installing a new spark plug, proper gapping is essential. Check your mower’s manual for the correct gap specification (usually between 0.028 and 0.031 inches), and use a gap tool to adjust the metal electrode carefully. Too wide or too narrow, and your mower won’t start reliably.
Before installation, apply a tiny dab of anti-seize compound to the threads—this prevents future frustration when you need to remove it again. Hand-tighten the plug first to avoid cross-threading, then give it a final snug with your socket wrench. Don’t overtighten; you’re aiming for snug, not Hercules-level torque!
Here’s a sustainable practice worth mentioning: never toss old spark plugs in regular trash. The metal components are recyclable, and many auto parts stores accept them. Some recycling centers also take small engine parts. By properly disposing of these seemingly small items, you’re keeping metal waste out of landfills and contributing to a more circular economy—one spark plug at a time. It’s a simple step that aligns perfectly with responsible lawn care practices.
Carburetor Problems: When Fuel Goes Bad Inside
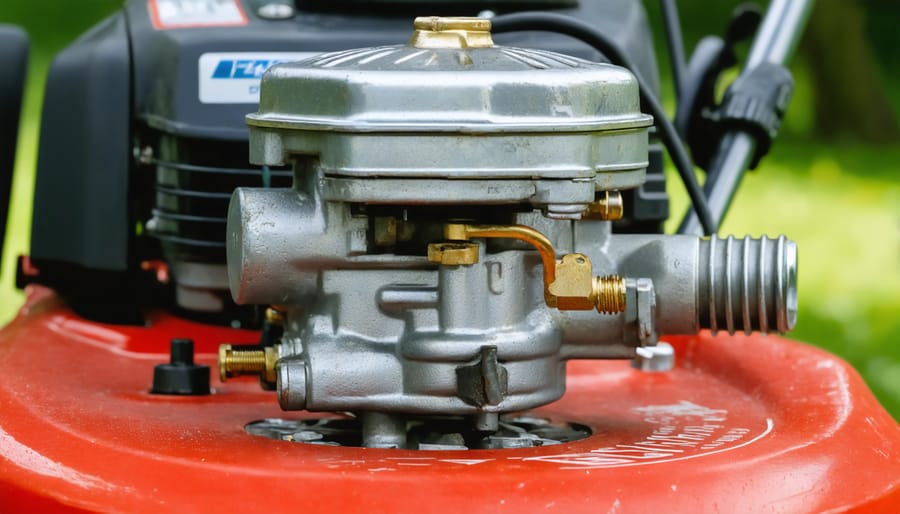
Signs Your Carburetor Needs Attention
Your carburetor is likely the culprit if your mower shows these telltale signs. First, does your engine turn over but refuse to fire up, or does it start briefly then sputter out within seconds? That’s classic carburetor behavior. You might also notice your mower acting like it’s running out of gas even with a full tank, or running roughly before dying completely.
Here’s a simple diagnostic: if you’ve already confirmed you have fresh fuel and your spark plug sparks (we’ll cover that elsewhere), the carburetor moves to the top of your suspect list. Another giveaway is a strong fuel smell without the engine starting—this suggests fuel isn’t atomizing properly due to clogged jets.
The good news? Carburetor issues are incredibly common after winter storage and often fixable at home. Old fuel leaves behind varnish deposits that gum up those tiny passages inside. Unlike electrical problems that can be mysterious, carburetor symptoms are usually straightforward and respond well to cleaning or, as a sustainable choice, rebuilding rather than replacing.
DIY Carburetor Cleaning
If you’re comfortable with basic maintenance and want to save some money, cleaning the carburetor yourself is totally doable—though I’ll be upfront: it’s not for everyone, and there’s no shame in calling a professional if you’d rather not tackle it.
Here’s what you’ll need: a carburetor cleaning spray, a small socket or wrench set, a clean workspace with good lighting, an old toothbrush, safety glasses, and your phone to take photos during disassembly (trust me on this one). Work in a well-ventilated area since carburetor cleaner has strong fumes.
Start by disconnecting the spark plug wire for safety, then turn off the fuel valve or clamp the fuel line. Locate the carburetor—it’s usually where the air filter connects to the engine. Remove the air filter housing, then disconnect the fuel line (have a small container ready to catch any drips). Take photos before removing any springs or linkages so you remember where everything goes.
Remove the carburetor bowl—there’s typically one bolt at the bottom. Inside, you’ll find the float and jet. Spray all visible parts with carburetor cleaner, paying special attention to any tiny holes or passages. Use the toothbrush for stubborn deposits. Let everything dry completely before reassembling in reverse order.
This sustainable approach keeps your mower running longer and reduces waste. However, if you encounter corroded parts or feel uncertain at any step, a professional can handle it efficiently.
When to Call a Professional
If you’ve worked through the basic fixes—fresh fuel, new spark plug, cleaned carburetor—and your mower still refuses to cooperate, it’s time to call in a professional. There’s no shame in this! Complex issues like internal engine damage, electrical system failures, or a completely seized engine require specialized tools and expertise that most of us simply don’t have in our garages.
Expect to pay between $75-150 for a standard diagnostic and tune-up at most repair shops. While this might seem steep, it’s often cheaper than buying replacement parts you don’t need or accidentally causing more damage. A good technician can quickly pinpoint problems that might take you hours to troubleshoot. Plus, many shops offer seasonal maintenance packages that include winterization services—a smart investment for preventing next year’s startup headaches while supporting sustainable equipment longevity rather than premature replacement.
Battery-Powered and Electric Mower Considerations
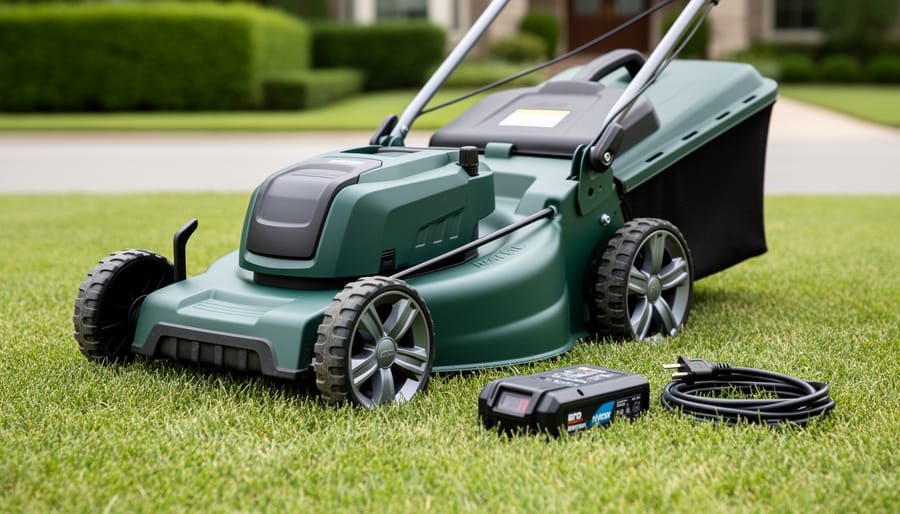
If you’re among the growing number of gardeners making the sustainable switch to electric or battery-powered mowers, congratulations! You’re doing your part for quieter neighborhoods and cleaner air. However, these eco-friendly alternatives come with their own unique spring startup challenges after winter storage.
The most common culprit? A completely discharged battery. Unlike gas mowers, lithium-ion batteries can lose charge during winter storage, and some batteries enter a protective “deep sleep” mode if they drop below a critical voltage. Before assuming the worst, connect your battery to its charger and give it several hours—sometimes up to 24 hours for severely depleted batteries. Many modern chargers have indicators that show whether the battery is accepting a charge or has fallen into that deep discharge state.
While waiting, inspect the battery terminals and connections carefully. Corrosion isn’t just a gas mower problem! Even a tiny bit of oxidation on electric connections can prevent proper contact. Gently clean terminals with a dry cloth or soft brush. For stubborn corrosion, a cotton swab with a bit of rubbing alcohol works wonders. Make sure connections click firmly into place—loose contacts are surprisingly common battery issues.
Check your charger too—sometimes the problem isn’t the battery at all. Test the outlet with another device, and examine the charger cord for any damage from winter storage.
If your battery simply won’t hold a charge after a full charging cycle, it may have reached the end of its lifespan, typically 3-5 years. The good news? Replacing a battery is straightforward, and many manufacturers offer trade-in programs for responsible recycling of old batteries.
For corded electric mowers, inspect the entire length of the cord for cuts or worn spots before plugging in.
Still Won’t Start? Additional Troubleshooting Steps
Check the Primer Bulb and Fuel Lines
After sitting idle through winter, your fuel system components can deteriorate, causing starting headaches. Let’s check these often-overlooked parts.
Start with the primer bulb—that small rubber dome you press to pump fuel. Give it a gentle squeeze. It should feel firm and spring back quickly. If it’s cracked, sticky, or stays compressed, it needs replacing. A faulty primer bulb won’t deliver fuel to the carburetor, leaving your engine gasping for gas.
Next, trace the fuel lines from the tank to the carburetor. Look for cracks, especially where the lines bend or connect. Winter cold makes rubber brittle, and even hairline cracks can suck air instead of fuel. Gently squeeze the lines—they should feel pliable, not hard or musty. If you spot any deterioration, replace them. These components are inexpensive and straightforward to swap out.
While you’re inspecting, check for clogs. Disconnect a fuel line (have a container ready!) and see if fuel flows freely. Old fuel can leave gummy deposits that block delivery. A quick flush with fresh fuel often clears minor blockages, getting you back to mowing without expensive repairs.
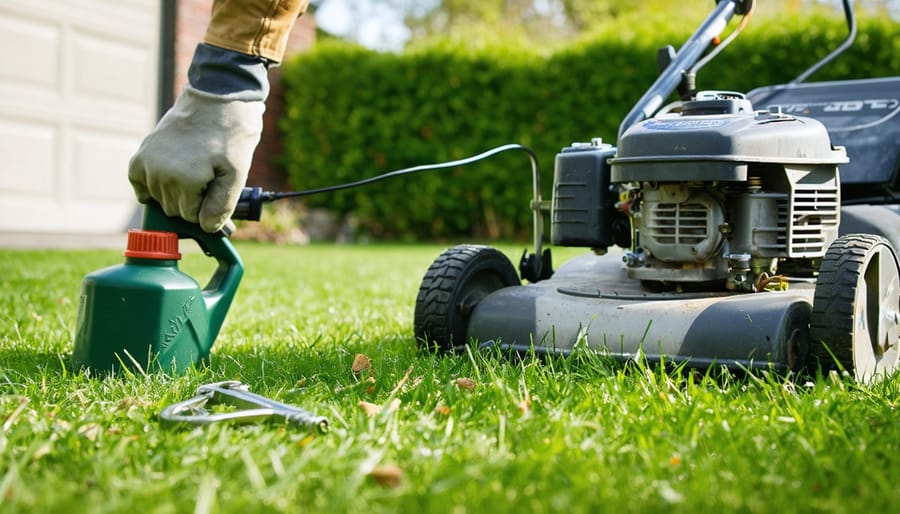
Inspect the Blade and Undercarriage
Before we dive under there, let’s talk safety first—**always** disconnect the spark plug wire before inspecting underneath your mower. This simple step prevents accidental starts and keeps your fingers attached to your hands, which I think we can all agree is ideal!
Now, flip your mower on its side (with the air filter and carburetor facing up to prevent oil leaks). You might be surprised what winter left behind. I’ve found everything from compacted grass clippings to small rodent nests tucked near the blade! This debris can jam the blade, making your engine work so hard it simply refuses to start.
Check that the blade spins freely by hand. If it’s stuck or grinding, you’ve likely found your culprit. Remove any visible debris with a putty knife or stiff brush. While you’re down there, inspect the blade itself—winter corrosion can create rough edges that strain the engine. A dull or damaged blade doesn’t just affect cutting performance; it creates extra resistance that prevents starting.
This is also the perfect opportunity to embrace a sustainable practice: clean grass clippings make excellent compost rather than heading to the landfill! Give everything a good cleaning, and you’ll often solve starting issues right here.
Preventing This Headache Next Year
The good news? You never have to face this springtime frustration again. A little autumn effort truly goes a long way toward protecting your investment and ensuring your mower fires up reliably when you need it.
**Start with Fuel Management**
This is the single most important preventative step. Before storing your mower for winter, either run the tank completely dry or—my preferred method—add a quality fuel stabilizer to a full tank and run the engine for five minutes to circulate it through the system. Stabilizer prevents that gummy varnish buildup we discussed earlier. I’ve seen mowers that sat for six months with stabilized fuel start on the first pull come spring. It’s genuinely that effective.
If you choose to run the tank dry, don’t forget the carburetor. After the engine dies from fuel starvation, briefly turn it over once more to clear any remaining gas from the carburetor bowl.
**Change the Oil Before Storage**
Used oil contains combustion acids and contaminants that can corrode internal components during idle months. Fresh oil protects against this. It takes fifteen minutes and costs less than a service call. While you’re at it, replace or clean the air filter—why let dust and debris sit against engine components all winter?
**Battery Care Matters**
For battery-powered or electric-start mowers, remove the battery and store it somewhere cool and dry, but not freezing. Check the charge monthly and top it up if needed. Batteries slowly self-discharge, and a completely dead battery degrades faster. This simple habit extends battery life by years.
**Keep It Clean and Covered**
Scrape grass clippings from the deck, wipe down metal surfaces, and store your mower in a dry location. Moisture is the enemy. If you must store it outdoors, invest in a weatherproof cover—it’s cheaper than replacing rusted parts.
**Document Your Maintenance**
Keep a simple log noting when you changed oil, added stabilizer, or replaced parts. Next spring, you’ll know exactly what condition you left your mower in, eliminating guesswork.
Think of winterization as an investment in hassle-free spring mornings. Those thirty minutes in autumn mean you’ll be mowing your first growth of the season while your neighbors are still troubleshooting. That’s time better spent enjoying your garden.
You’ve got this! If your mower won’t start after sitting through winter, you’re dealing with one of the most common lawn care challenges—and the good news is that most solutions are surprisingly simple. Whether it’s stale fuel, a dirty spark plug, or a clogged carburetor, these aren’t mysterious mechanical failures. They’re predictable consequences of seasonal storage, and now you know exactly how to address them.
By taking a methodical approach to troubleshooting, you’ve likely saved yourself a costly repair bill while gaining valuable knowledge about how your mower works. Even better, by maintaining your equipment properly, you’re extending its lifespan and keeping it out of landfills—a win for both your wallet and the environment. Regular maintenance means fewer replacements, less waste, and a smaller carbon footprint from manufacturing and shipping new equipment.
Remember, prevention is your best strategy. When fall arrives, take those simple winterization steps we discussed, and you’ll breeze through next spring’s startup. If you found this guide helpful for getting a dormant mower running, explore our other lawn care resources for more practical tips on maintaining a healthy, sustainable lawn throughout the seasons. You’re building skills that’ll serve you for years to come!