You’ve installed a fresh battery, turned the key with anticipation, and… nothing. That sinking frustration is all too familiar to riding mower owners who expected a new battery to solve their no-start problems. The reality is that while a dead battery is the most common culprit, it’s far from the only reason your mower refuses to fire up.
**Check your safety switches first**—the seat switch, brake/clutch pedal switch, and blade engagement switch all prevent starting when not properly engaged, and any one of them can fail or become misaligned. These protective mechanisms are designed to keep you safe, but they’re also frequent troublemakers that mimic battery issues.
**Test your starter solenoid** by listening for a clicking sound when you turn the key; if you hear clicking but no engine turnover, the solenoid is receiving power but failing to deliver it to the starter motor. A direct 12-volt test with jumper cables can quickly confirm whether it needs replacement.
**Inspect all electrical connections** for corrosion, looseness, or damage—particularly at the battery terminals, starter motor, and ground cables. Even a new battery can’t deliver power through compromised connections, and green or white corrosion acts as an insulator that blocks current flow.
This guide walks you through systematic troubleshooting beyond the battery, moving from the simplest checks to more involved diagnostics, so you can identify the real issue and get back to mowing without an expensive service call.
Understanding Why a New Battery Isn’t Always the Answer
I’ve been there myself—standing in the garage, staring at a riding mower that refuses to start despite having just installed a brand-new battery. It’s frustrating, and I understand why you might feel like you’ve been sold the wrong solution. But here’s the thing: your riding mower’s starting system is like a team sport, and the battery is just one player on the field.
Think of your mower’s electrical system as a chain with several links. The battery stores power, yes, but that power needs to travel through cables to reach the starter motor. Along the way, it passes through safety switches, the ignition switch, solenoids, and various connections. If any single link in this chain is corroded, loose, or broken, your mower turns over but won’t start—or worse, does nothing at all.
Many lawn care enthusiasts assume a dead battery means the battery itself is the culprit. Sometimes that’s true, but often the battery was simply the messenger, showing symptoms of a deeper problem. A failing alternator, parasitic drain, or corroded ground connection can kill even the best battery within days.
Setting realistic expectations here is important: diagnosing electrical issues requires patience and a systematic approach. You’re not looking for a magic bullet; you’re being a detective, methodically checking each component until you find the real troublemaker. The good news? Most of these issues are fixable with basic tools and a bit of guidance, saving you money and keeping your mower out of the landfill—a win for both your wallet and sustainable lawn care practices.
First Things First: Verify Your New Battery Is Actually Working

Check Battery Connections and Terminals
Even with a brand-new battery, poor connections can stop your riding mower dead in its tracks. Think of it like trying to water your garden with a kinked hose—the power’s there, but it can’t flow properly.
Start by locating your battery terminals. You’ll see two thick cables attached to metal posts—one marked positive (+) and one negative (-). Disconnect the negative cable first (safety first!), then the positive. Look closely at both terminals and cable ends for white, green, or blue crusty deposits—that’s corrosion blocking the electrical connection.
Here’s your cleaning routine: Mix a tablespoon of baking soda with a cup of water and apply it to the terminals using an old toothbrush. You’ll see it fizz away the corrosion—it’s oddly satisfying! Rinse with clean water and dry thoroughly. For stubborn buildup, use a wire brush or battery terminal cleaner tool.
Before reconnecting, inspect the cable ends for fraying or damage. Wiggle them gently—they should feel snug, not loose. Reconnect the positive cable first, then negative, tightening firmly. A little petroleum jelly or dielectric grease on the terminals prevents future corrosion and keeps things running smoothly all season long.
Test the Battery Voltage
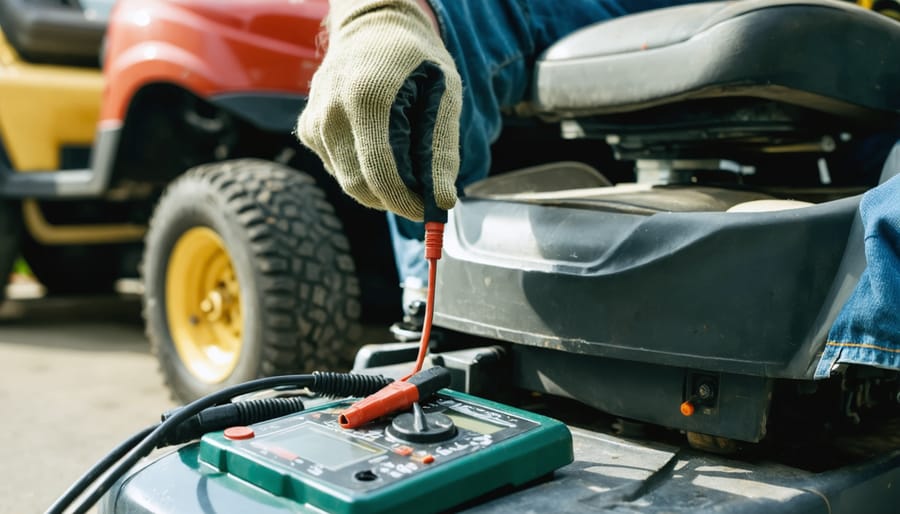
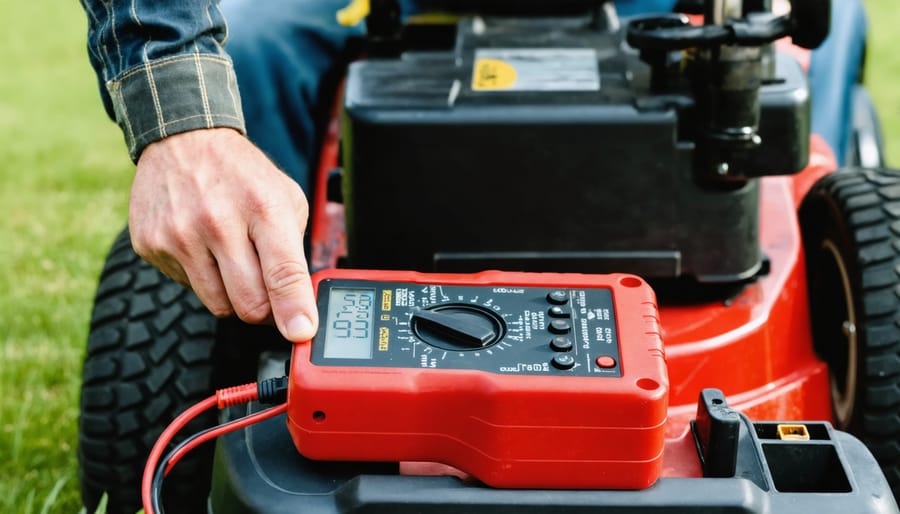
Even though your battery is brand new, it’s worth confirming it’s holding the correct charge—sometimes batteries sit on shelves too long or have manufacturing defects. Grab a multimeter (an inexpensive tool that’s handy for all sorts of lawn equipment troubleshooting) and set it to measure DC voltage.
Touch the red probe to the positive battery terminal and the black probe to the negative terminal. A fully charged 12-volt battery should read between 12.6 and 12.8 volts. If you’re seeing 12.4 volts or less, your “new” battery isn’t fully charged and may need charging before use. Readings below 12 volts suggest the battery is significantly discharged or possibly defective—yes, even new batteries can fail!
Here’s something important: if your reading is good but drops significantly (below 10 volts) when you turn the key, the battery can’t handle the load. This usually means internal battery failure or, more commonly, a problem with your charging system that’s immediately draining power. Either way, you’ve just narrowed down your problem considerably, saving yourself time and potentially unnecessary parts purchases—that’s sustainable troubleshooting at its best!
The Safety Switch System: A Common Culprit

How to Test Each Safety Switch
Now let’s get hands-on with testing those safety switches—this is easier than you might think, and you probably won’t need more than a few simple tools. I’ll walk you through checking each one so you can pinpoint exactly what’s keeping your mower from starting.
**Testing the Seat Safety Switch**
Start with the easiest one. Sit firmly in the operator’s seat and try starting your mower. If it starts, great! But if not, try this: while seated, reach under the seat to locate the switch (it looks like a small button or plunger). With your weight still on the seat, gently press or jiggle the switch mechanism. If the mower suddenly starts, you’ve found your culprit—the switch isn’t registering your weight properly.
For a more definitive test, use a multimeter set to continuity mode. Disconnect the switch wires and test with the plunger pressed (simulating someone sitting) versus released. You should see continuity when pressed, none when released. No change? Replace it.
**Checking the Parking Brake Switch**
Engage your parking brake firmly—and I mean really firmly. Sometimes these switches require more pressure than you’d expect. Try starting again. If nothing happens, locate the brake switch near the brake lever or pedal. With the brake engaged, you can carefully bypass this switch by connecting its two wires together temporarily with a jumper wire. If the mower starts, the switch needs replacing.
**Testing the PTO/Blade Engagement Switch**
Ensure your blade engagement lever is fully disengaged—push it all the way off. The switch should be near this lever. Like the brake switch, you can test it with a multimeter for continuity when disengaged, or carefully bypass it to see if that’s your problem. This simple process of elimination saves you from replacing parts unnecessarily, which is both economical and environmentally responsible.
Bypassing vs. Replacing Safety Switches
I need to address something important here: while troubleshooting your mower’s starting issues, you might come across advice suggesting you “bypass” safety switches to get things running again. Please don’t do this—it’s genuinely dangerous and could lead to serious injury.
Safety switches exist for excellent reasons. They prevent the mower from starting when you’re not in the seat, when the blades are engaged, or when the parking brake isn’t set. Bypassing these features might seem like a quick fix, but you’re essentially removing the guardrails that protect you and anyone nearby.
If you’ve identified a faulty safety switch during your troubleshooting, the responsible approach is to replace it properly. These switches are surprisingly affordable—usually between $10 and $30—and straightforward to install. You’ll find replacement parts at most lawn equipment stores or online retailers.
Think of it this way: sustainable lawn care isn’t just about environmental practices; it’s also about maintaining equipment safely so it serves you reliably for years to come. A properly functioning mower with all safety features intact protects both you and your investment. Take the extra hour to replace that switch correctly—your future self will thank you for keeping all ten fingers intact for more gardening projects!
Starter Motor and Solenoid Issues
Testing the Starter Solenoid
If your mower clicks but won’t turn over, the starter solenoid is likely your culprit. This small but mighty component acts as an electrical relay between your battery and starter motor—and when it fails, you’re going nowhere fast.
Here’s how to test it: Turn your ignition key and listen carefully. A single loud click indicates the solenoid is engaging but not completing the circuit. Rapid clicking often points to insufficient power, though with your new battery, this suggests the solenoid itself is faulty. If you hear absolutely nothing, check out our guide on a riding mower with no click for additional troubleshooting.
The bypass test confirms solenoid failure: Using an insulated screwdriver, carefully bridge the two large terminal posts on the solenoid. If the starter engages and cranks the engine, you’ve found your problem. **Safety first**—ensure the mower is in neutral, the blade is disengaged, and you’re not touching any metal parts.
Replacing a solenoid is straightforward and costs around $15-30, making it one of the more economical fixes. This sustainable approach keeps your mower running longer without requiring expensive service calls.
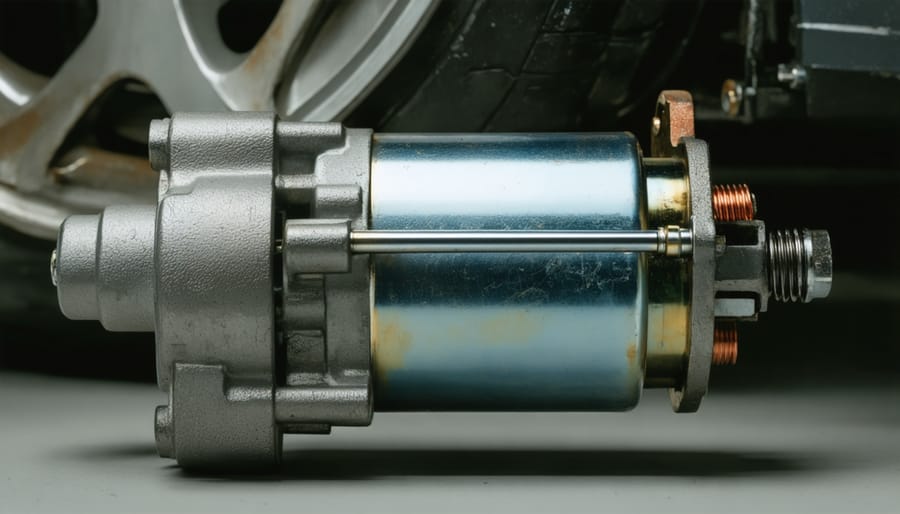
Diagnosing a Failed Starter Motor
If you’ve eliminated the battery and connections as culprits, the starter motor itself might be the problem. Don’t worry—diagnosing this is easier than you might think, and you can do it right in your own garage!
First, listen carefully when you turn the key. A clicking sound usually means the solenoid is working but the starter motor isn’t engaging. Complete silence? That’s actually a different issue we’ll cover shortly. What you’re listening for is absolutely nothing happening when the starter should be cranking.
Here’s a simple test: locate your starter motor (usually near the engine’s flywheel) and gently tap it with a wrench handle while someone turns the key. If the mower suddenly starts, your starter motor’s internal components are sticking—a clear sign it needs replacement.
For a more definitive check, use a multimeter to test the starter. With the key turned to “start,” you should see 12 volts at the starter’s positive terminal. If voltage is present but nothing happens, the motor has failed internally. This is a perfectly normal wear-and-tear issue, especially on older mowers.
Remember, replacing a starter motor yourself saves money and keeps your trusty mower out of the landfill longer—a win for both your wallet and our planet!
Ignition Switch and Wiring Problems
I know how frustrating it is to replace a battery only to turn the key and hear… nothing. Sometimes the culprit isn’t about power storage—it’s about power delivery. Even with a fully charged new battery, electrical current needs a clear path to reach your mower’s engine, and that’s where ignition switches and wiring come into play.
The ignition switch acts as the gatekeeper for your mower’s electrical system. When you turn the key, it completes circuits that send power to the starter solenoid and other essential components. Over time, these switches can wear out internally, develop corrosion, or simply fail. You might hear a click or absolutely nothing when turning the key—both can indicate a faulty switch. Testing requires a multimeter, but if you’re not comfortable with that, try wiggling the key while turning it. If the mower occasionally tries to start, the switch likely needs replacement.
Now here’s something I’ve seen too many times in my years helping fellow gardeners: rodent damage. Mice and other small creatures love to nest in warm engine compartments during colder months, and they’re notorious for chewing through wire insulation. Take a few minutes to visually inspect your wire harnesses, especially around the battery, under the seat, and near the engine. Look for exposed copper wire, frayed insulation, or completely severed wires.
Corrosion is another sneaky issue. Even if wires look intact, check all connection points for that telltale white or green crusty buildup. This acts as an insulator, blocking electrical flow. A wire brush and some dielectric grease can work wonders here—it’s a simple fix that supports keeping your equipment running longer and reduces waste.
Pay special attention to ground wires, which are often overlooked. A loose or corroded ground connection prevents the electrical circuit from completing properly, leaving you stranded with a perfectly good battery.
Fuel System Factors That Prevent Starting
Here’s the thing many folks don’t realize: your battery might be working perfectly fine, but if fuel isn’t reaching your engine, that mower won’t budge. Think of it like having a fully charged phone but no service—all dressed up with nowhere to go!
Let’s start with the obvious culprit that catches more of us than we’d like to admit—an empty fuel tank. I know, I know, but trust me, it happens to the best of us! If there’s fuel in there, check its age. Gasoline degrades surprisingly quickly, especially fuel containing ethanol. After just 30 days, it starts breaking down, forming gummy deposits that clog your system. From a sustainability perspective, this is exactly why proper fuel storage matters—old fuel doesn’t just prevent starting, it creates waste and potential environmental hazards when disposed of improperly.
Next, examine your fuel filter. This small but mighty component catches debris before it reaches your engine. A clogged filter starves your engine of fuel, preventing ignition entirely. These filters are inexpensive and easy to replace—think of it as routine maintenance rather than a repair.
Your fuel pump deserves attention too. Listen carefully when you turn the key—you should hear a faint whirring sound as the pump primes. No sound? The pump might have failed. Additionally, check for bad fuel solenoid symptoms, which can prevent fuel flow even when everything else checks out.
The good news? Most fuel system issues are straightforward fixes that’ll have you mowing again without breaking the bank or calling in a professional.
When to Check the Charging System
If your riding mower still won’t start after installing a new battery, there’s a good chance your charging system has been working against you all along. Think of it like this: even the healthiest battery can’t survive if your mower’s alternator or voltage regulator isn’t doing its job. These components keep your battery charged while you’re mowing, and when they fail, they’ll drain your original battery—and unfortunately, your new one too.
Here are the warning signs that pointed to charging system trouble all along: if your old battery died after seemingly shorter periods between uses, if you noticed dimming headlights while mowing, or if the battery warning light flickered on your dashboard, your alternator was likely struggling.
Testing your charging system is straightforward and doesn’t require expensive equipment. With a basic multimeter (a worthwhile $20 investment for any DIY lawn care enthusiast), start your mower and check the voltage at the battery terminals. You should see between 13.5 and 14.5 volts. Anything below 13 volts means your alternator isn’t charging properly. If you’re getting no reading at all, check the voltage regulator connections—corrosion here is surprisingly common and easily cleaned.
Catching charging system problems early prevents unnecessary battery replacements and reduces waste—a win for both your wallet and sustainable lawn care practices. Once you’ve identified the faulty component, replacement is usually simpler than you’d expect.
Systematic Troubleshooting: Your Step-by-Step Action Plan
Now that we’ve covered the common culprits behind your starting troubles, let’s bring everything together into a practical action plan. Think of this as your roadmap from frustration to a smoothly running mower—we’ll start with the quickest wins and gradually work toward more involved checks.
**Step 1:** Verify your new battery connections are clean and tight. I know this seems obvious, but loose terminals are surprisingly common! Give each cable a gentle tug and clean any corrosion with a wire brush.
**Step 2:** Check that your mower is in neutral and the parking brake is engaged. Test your safety switches by sitting in the seat, pressing the brake, and checking that the blade engagement lever is off. These little switches prevent more starting issues than you’d imagine.
**Step 3:** Turn the key and listen carefully. Do you hear clicking? That’s likely your starter solenoid. A rapid clicking means it’s trying but not getting enough power through.
**Step 4:** Inspect all fuses in your system. They’re cheap components but crucial gatekeepers. Replace any that look blown or darkened.
**Step 5:** Test your ignition switch by bypassing it temporarily (consult your manual for specific terminals). If the mower starts, you’ve found your villain.
**Step 6:** Examine all visible wiring for damage, especially near moving parts or where rodents might nibble. Even a single compromised wire can halt everything.
**Step 7:** Check your starter motor connections and tap it gently with a hammer while someone turns the key—sometimes stuck brushes just need encouragement.
**Step 8:** If nothing’s worked yet, test your charging system with a multimeter to ensure the alternator charges properly, preventing future dead batteries.
This systematic approach to troubleshooting starting problems saves time and prevents unnecessary part replacements—better for your wallet and more sustainable for our planet.
Preventive Maintenance to Avoid Future Starting Problems
Now that you’ve successfully diagnosed and fixed your mower’s starting issue, let’s talk about keeping it running smoothly for years to come. A little preventive care goes a long way in avoiding those frustrating no-start mornings—and it’s better for the planet too.
**Keep Your Electrical System Happy**
Think of your mower’s electrical system like a garden—it needs regular attention to thrive. Every few months, pop the hood and inspect battery terminals for corrosion. That white, crusty buildup isn’t just unsightly; it’s blocking the flow of electricity. A simple cleaning with a wire brush and baking soda solution takes five minutes and prevents countless headaches. While you’re there, wiggle those connections gently. Loose terminals are sneaky troublemakers that often masquerade as bigger problems.
Check your ground connections too. These unsung heroes complete the electrical circuit, and a corroded ground strap can leave you puzzled even after replacing perfectly good parts. A quick visual inspection twice a season catches issues before they strand you mid-mow.
**Battery Care That Actually Works**
Even quality batteries need proper care. If you’re storing your mower for winter, disconnect the battery and keep it in a cool, dry place—not freezing, just cool. A basement shelf works perfectly. Better yet, invest in a trickle charger or battery maintainer. These affordable devices keep your battery at optimal charge without overcharging, extending its life by years.
During mowing season, run your mower long enough to fully recharge the battery after starting. Those quick ten-minute trim jobs don’t give your charging system enough time to replenish what starting consumed.
**Seasonal Storage Done Right**
Proper winterization prevents spring disappointments. Beyond battery care, stabilize your fuel to prevent gum buildup that clogs carburetors and creates starting problems. Run the engine until it’s warm, add stabilizer, then let it run another five minutes to distribute throughout the system. This simple step keeps fuel-related issues at bay while reducing the need for replacement parts—keeping both your wallet and landfills happier.
The good news? Most riding mower starting problems—even when you’ve just installed a fresh battery—are completely solvable with a bit of patience and systematic troubleshooting. You’ve already taken an important first step by ruling out a dead battery, and now you’re equipped with the knowledge to check safety switches, electrical connections, the starter motor, and fuel delivery system. Remember, jumping straight to replacing parts can be expensive and wasteful. By taking the time to properly diagnose the issue first, you’re not only saving money but also keeping perfectly functional components out of landfills—a win for both your wallet and the environment.
We’ve all been there, scratching our heads over stubborn equipment, but working through these challenges methodically almost always leads to a solution. Have you discovered what was preventing your mower from starting? Perhaps you found a corroded connection or a stuck safety switch? We’d love to hear about your experience in the comments below, and if you’re still troubleshooting, don’t hesitate to ask questions—our community is here to help you get back to mowing!